How to Choose the Right Loss In Weight Feeder for Your Application

Selecting the right loss in weight feeders is essential for maintaining accuracy and efficiency in your production process. With options like Twin Screw Loss-In-Weight Feeders and Single Screw Loss-In-Weight Feeders, it’s important to understand your material properties, feed rate, and production goals to choose the most suitable feeder for your needs.


When deciding on a loss in weight feeders, you need to assess several factors that influence its performance. These factors include the nature of the material, required throughput, the level of precision needed, available space, and budget constraints. Let’s explore these key considerations to help you make an informed decision.


Key Factors to Consider

Material Characteristics

Twin screw loss-in-weight feeders are ideal for challenging materials like powders, blends, or sticky substances, offering better flow uniformity.

Single screw loss-in-weight feeders work well with uniform materials such as pellets or granules that flow easily.


Feed Rate and Throughput

Twin screw feeders are better suited for high-throughput applications, handling large quantities of material efficiently.

Single screw feeders are more suitable for lower throughput or smaller operations.


Precision Needs

Twin screw feeders provide better precision for materials with inconsistent flow, offering superior control over the feed rate.

Single screw feeders are more cost-effective for materials that are uniform and flow consistently.


Space and Budget

Single screw feeders are compact, cost-effective, and easier to maintain, making them ideal for smaller spaces and budgets.

Twin screw feeders are larger and more expensive but offer higher performance and better material handling.


Maintenance Requirements

Single screw feeders are simpler and easier to maintain due to fewer moving parts.

Twin screw feeders require more maintenance but are built for higher performance in demanding applications.


Choosing the right loss in weight feeders depends on your specific application needs, material types, throughput, and available space. Evaluating these factors will help you select the most suitable feeder for your production process.

Troubleshooting Common Issues with Loss In Weight Feeders

Loss In Weight Feeders are essential in various industries for ensuring accurate and efficient material feeding. However, like any equipment, they can encounter issues that affect their performance. Troubleshooting these problems quickly can help minimize downtime and maintain optimal productivity. Below are some common issues with Loss In Weight Feeders and how to address them.


1. Inconsistent Feed Rate

One of the most common issues with Loss In Weight Feeders is inconsistent feeding. This could result from incorrect calibration, material build-up, or sensor malfunctions.

Solution: Ensure that the feeder is properly calibrated according to the material properties and required feed rate. Regular maintenance of the load cells and sensors is crucial for maintaining accuracy. For Twin Screw Loss-In-Weight Feeders, check for any wear or damage to the screws, as this can disrupt the even distribution of material.


2. Material Bridging or Blockages

Bridging occurs when material forms a blockage in the hopper, preventing it from flowing properly. This is common with materials that are hygroscopic, sticky, or have a tendency to clump.

Solution: If using a Single Screw Loss-In-Weight Feeder, consider installing a vibration system or adjusting the screw’s speed and feed rate to help break up clumps. For Twin Screw Feeders, check the screws for any misalignment or wear that could be causing inconsistent material flow.


3. Poor Accuracy or Weight Drift

If the feeder is not accurately measuring the material being dispensed, it could result in over- or underfeeding, affecting product quality.

Solution: Check the scale and load cell calibration. For Loss In Weight Feeders, ensure that the system is zeroed out regularly and that the material's density hasn't changed. A Twin Screw Loss-In-Weight Feeder may require recalibration more frequently, especially if handling a variety of materials with different densities.


4. High Maintenance Requirements

If a Loss In Weight Feeder is requiring more maintenance than usual, it could be a sign of wear or improperly adjusted settings. Frequent breakdowns can result from issues like damaged screws or motors.

Solution: Regular maintenance schedules are essential. Inspect both Single Screw Loss-In-Weight Feeders and Twin Screw Feeders for any signs of damage or wear, particularly on moving parts like screws, motors, and load cells. Proper lubrication and regular checks on the screws can reduce wear and extend the lifespan of the feeder.


5. Poor Material Flow

In some cases, the material may not flow as expected due to environmental factors such as humidity or temperature, or due to poor screw design.

Solution: For Single Screw Loss-In-Weight Feeders, adjusting the feed screw speed or angle may improve flow. For Twin Screw Feeders, ensure that the screws are designed to handle the specific material characteristics, especially when processing powders or granules that might have different flow properties.


By understanding these common issues and their solutions, you can ensure that your Loss In Weight Feeders, whether Twin Screw or Single Screw, continue to operate efficiently and effectively. Regular maintenance and quick troubleshooting are key to minimizing disruptions and keeping your production process on track.

Sanitary Napkin Test Methods Ensuring Quality and Performance

Sanitary Napkin Test Methods: Ensuring Quality and Performance


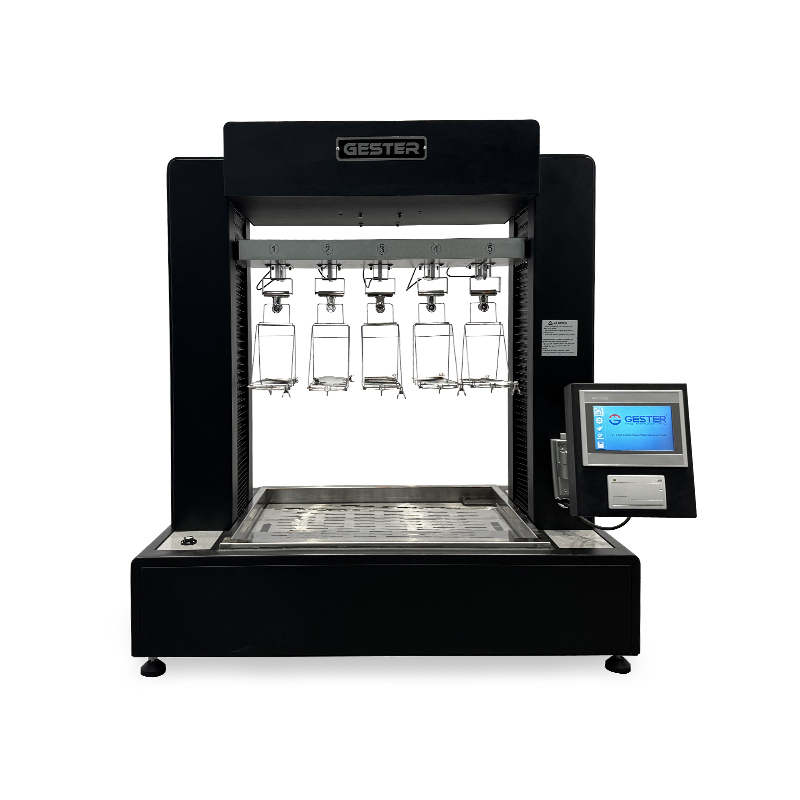
When it comes to personal hygiene products like sanitary napkins, performance and reliability are paramount. Quality testing is crucial to ensure products meet the needs and comfort of users. GESTER explores the sanitary napkin test methods and highlights specialized equipment such as the Sanitary Napkins Backing Peeling Strength Machine GT-CN18, Sanitary Napkins Absorption Speed Tester GT-CN19, and Sanitary Napkin Water Absorbency Tester GT-CN20, all of which play key roles in ensuring product quality.

Importance of Testing in Sanitary Napkins
Sanitary napkins serve as essential products for women, and their functionality directly impacts user comfort and confidence. Testing ensures that each napkin performs optimally in terms of absorbency, adhesion, and material integrity. It also ensures compliance with international quality standards, which is vital for market acceptance.

Key aspects to evaluate include:
Adhesion: How well the backing adheres to fabrics or underwear.
Absorption Speed: The rate at which the napkin absorbs fluid.
Water Absorbency: The total amount of liquid a napkin can retain.
To achieve this, specialized testing machines are required.

1. Backing Peeling Strength Test: GT-CN18 
The Sanitary Napkins Backing Peeling Strength Machine GT-CN18 is a precise tool used to evaluate the adhesive strength between the sanitary napkin backing and cotton fabrics.

Key Features of Sanitary Napkins Backing Peeling Strength Machine
  • Touch screen control, Chinese and English menus, man-machine dialogue mode, easy yo operate.
  • Built-in thermal printer, convenient to print test results quickly on site.
  • Sanitary Napkins Backing Peeling Strength Machine Professional computer analysis software.
  • Sanitary napkin adhesive strength tester can realize bidirectional operation with computer; report statistics, graph visual analysis, etc.
  • High precision sensor, good linearity and stability; stepper motor drive, ball screw drive.
Product Detail Sanitary Napkins Backing Peeling Strength Machine
2. Absorption Speed Test: GT-CN19
The Sanitary Napkins Absorption Speed Tester GT-CN19 measures how quickly a sanitary napkin absorbs fluid, a crucial factor for user comfort and hygiene.

Key Features of Sanitary Napkins Absorption Speed Tester
  • Sanitary Pads Absorption Speed Tester Touch screen control, Chinese and English menus, man-machine dialogue mode, easy to operate.
  • Built-in thermal printer, convenient to print test results quickly.
  • High precision peristaltic pump to ensure the accuracy of penetrating liquid capacity.
  • Sanitary Napkin Water Absorption Rate Tester: Automatic liquid addition, automatic testing, no need to manually add liquid.
  • Electrodes are processed with special materials, good induction;electrodes are automatically positioned.
  • The sample mounting kit has overflow receiving device.
Sanitary Napkins Absorption Speed Tester
3. Water Absorbency Test: GT-CN20
The Sanitary Napkin Water Absorbency Tester GT-CN20 evaluates the total water absorption capacity of sanitary napkins.

Key Features of Sanitary Napkin Water Absorbency Tester
  • Sanitary Napkin Water Absorbency Tester: Touch screen control, Chinese and English menus, man-machine dialogue mode, easy to operate.
  • Built-in thermal printer, convenient to print test results quickly on site.
  • High precision sensor, good linearity and stability.
  • Humanized operation interface,fully automatic to finish process of immersion, weighing, hanging, reset, etc.
  • Automatic weighing and calculating results and average values. Report data can be required and printed.
  • Sanitary Napkin Water Absorption Rate Tester: Five stations can test together or independently.
Sanitary Napkin Water Absorbency Tester
Why These Tests Matter
Each test method is designed to simulate real-world scenarios, ensuring that the sanitary napkins perform effectively. These tests also help manufacturers:

Enhance Product Design: Identify weak points in product structure and improve them.
Ensure User Safety: Verify that products meet health and safety standards.

Build Brand Trust: High-quality products boost consumer confidence and brand loyalty.


How GESTER Instruments Facilitate Testing
GESTER Instruments provides state-of-the-art equipment like Sanitary Napkins Backing Peeling Strength Machine GT-CN18, Sanitary Napkins Absorption Speed Tester GT-CN19, and Sanitary Napkin Water Absorbency Tester GT-CN20 to enable precise and reliable testing. Our machines are engineered with advanced features, ensuring repeatable results and compliance with industry standards.

Choosing the right testing solutions not only guarantees product quality but also reinforces brand reputation in a competitive market. With thorough testing, manufacturers can confidently deliver products that prioritize user comfort, safety, and satisfaction.

Softness Tester GT-CN05 A Comprehensive Guide

Softness Tester GT-CN05: A Comprehensive Guide

When it comes to evaluating the softness of materials like high-grade toilet paper, tobacco flakes, fiber paper products, and more, precision is key. Enter the Softness Tester GT-CN05 — a state-of-the-art device designed to ensure accuracy, reliability, and efficiency in softness testing. We will explore the applications, features, specifications, and advantages of this essential instrument, helping you understand why it’s the best choice for your testing needs.

Softness Tester


Applications of the Softness Tester GT-CN05


The Softness Tester GT-CN05 is a versatile device capable of determining the softness of various materials. Industries that benefit from this tester include:

Hygiene products: Evaluating the softness of high-grade toilet paper ensures customer satisfaction and meets quality standards.

Tobacco industry: Ensuring the right softness in tobacco flakes impacts production quality.

Paper manufacturing: Softness in fiber paper products is a crucial aspect of usability and performance.

Its wide application spectrum makes the Softness Tester GT-CN05 indispensable for maintaining high-quality standards across different industries.

Key Features of the tissue paper softness tester

The Softness Tester GT-CN05 boasts cutting-edge features that set it apart from its competitors. Let’s delve into what makes it a standout choice:

1. Leverage Principle for Precision

The measuring device incorporates the principle of leverage, significantly reducing data fluctuations caused by vibration. This ensures highly accurate and stable results.

2. High-Resolution Color Touchscreen

A modern, user-friendly touchscreen interface enhances operational ease, offering clear visibility of testing data and real-time force values.

3. Stepper Motor for Smooth Operation

The integration of a stepper motor guarantees precise transmission, ensuring stable and reliable performance during every test.

4. Advanced Force Sensor Technology

Equipped with a high-precision force sensor, the GT-CN05 softness tester for toilet paper delivers exceptionally accurate testing results, making it ideal for industries requiring stringent quality control.

5. Comprehensive Data Handling

This device can store data from up to 30 groups of 20 tests each, with separate memory for horizontal and vertical data. These records are easily accessible and printable, streamlining data management.

6. Real-Time Test Process Monitoring

During the test, real-time force values and graphical representations are displayed, enabling precise observation and analysis.

7. Built-in Thermal Printer

The built-in micro thermal printer generates reports quickly and quietly, with clear fonts for easy readability. This functionality simplifies result documentation and reduces noise in laboratory environments.

Technical Specifications

Here are the detailed technical specifications of the Softness Tester GT-CN05:

Testing Range: 10-1000mN

Testing Resolution: 0.1mN

Indication Error: ≤±1% FS (Allowable for 20% or less of the upper limit exceeding the specified range: 1mN)

Indicative Variability: <1%

Test Head Stroke: (12.0 ± 0.5)mm (Adjustable)

Test Head Press-in Depth: 8mm ± 0.5mm

Slit Width: 5mm, 6.35mm, 10mm, 20mm (Width error not exceeding ±0.05mm)

Testing Speed: (1.2 ± 0.24)mm/s

Printer: Thermal printer for immediate result reporting

These specifications underline the instrument’s ability to deliver accurate and repeatable results under varying conditions.

Benefits of the Softness Tester GT-CN05

The tissue paper softness tester stands out due to its unique blend of performance, ease of use, and advanced features. Here’s why it’s the go-to choice for professionals:

1. Enhanced Accuracy

The high-precision force sensor and advanced leverage mechanism work together to deliver exceptional accuracy, reducing errors and ensuring reliability.

2. User-Friendly Design

The intuitive interface, coupled with a high-resolution touchscreen, makes the device straightforward to operate, even for new users.

3. Data Management

With ample storage for test results and built-in reporting capabilities, data management becomes seamless and hassle-free.

4. Durable and Reliable

Crafted with durable materials and advanced components like the stepper motor, the GT-CN05 promises long-term reliable performance, reducing maintenance costs.

5. Real-Time Analysis

The ability to observe real-time force values and graphical outputs ensures immediate feedback, enabling quicker decision-making.

6. Quiet Operation

The low-noise thermal printer and smooth testing mechanism contribute to a quieter working environment, enhancing comfort during testing operations.

How to Get the Most Out of Your Softness Tester GT-CN05

To ensure the best performance and longevity of your GT-CN05 softness tester for toilet paper , follow these tips:

Calibration: Regularly calibrate the device to maintain accuracy.

Maintenance: Clean and inspect the machine after every testing cycle.

Storage: Store the tester in a stable environment, away from excessive vibration and temperature fluctuations.

Operator Training: Train your staff on optimal operation procedures to maximize efficiency and minimize errors.

Ready to elevate your testing capabilities? Choose the Softness Tester GT-CN05 and high precision, reliability, and efficiency like never before. Contact us today to learn more or place your order!

Understanding and Managing Mask Visual Field Tester GT-RA07

Understanding and Managing Mask Visual Field Tester GT-RA07

The Mask Visual Field Tester GT-RA07 is a precision instrument designed to evaluate the effective field of vision in full-face masks, half-face masks, and other respirators. Ensuring the visual field under a mask meets standard requirements is essential for user safety and comfort, particularly in industries where respiratory protection is critical, such as healthcare, manufacturing, and emergency response.

mask visual field testing machine

Key Features and Applications

The Mask Visual Field Tester GT-RA07 utilizes an apertometer to trace and measure the visual field. The primary objective is to determine whether a mask allows an adequate visual range without significant obstructions, ensuring users maintain awareness of their surroundings while wearing protective gear.

Testing Process:
- The mask is fitted onto a dummy head with lighting in each eye socket.
- The apertometer traces the shadow curves projected onto a hemispherical surface.
- Measurements include both the total field of vision and the overlapping field of vision, ensuring compliance with regulatory standards.

Acceptance Criteria


Before initiating the test, follow these preparation steps to ensure accurate results:


1. Install the Test Head Mould:
Attach the head mould and connect all necessary wires securely.

2. Head Mould Positioning:
- Adjust the head mould to the center position (0°), facing forward.
- Lock it in place to prevent any movement during testing.

3. Machine Level Adjustment:
Use the spirit level to ensure the machine is perfectly aligned.

4. Power Supply Check
- Confirm that the power source is stable and connected properly.
- Verify that both left and right lamp beads are glowing correctly.

Operational Steps

Testing with the Mask Visual Field Tester GT-RA07 involves evaluating both eyes separately and then analyzing the overlapping field of vision. Follow these steps for accurate operation:

1. Mask Installation
Fit the mask securely onto the dummy head. Ensure there is no slack or misalignment.

2. Left Eye Test
- Adjust the Head Mould: Move it to the right to position the left eye for testing.
- Activate the Left Lamp: Switch on the lamp and observe the visual field sphere.
- Plot the Curve: Trace the shadow formed on the sphere and draw the corresponding curve.

3. Right Eye Test
- Adjust the Head Mould: Move it to the left to position the right eye for testing.
- Activate the Right Lamp: Switch on the lamp and observe the visual field sphere.
- Plot the Curve: Trace the shadow formed on the sphere and draw the corresponding curve.

4. Overlapping Field Analysis
- Curve Intersection: Observe where the left and right eye curves intersect.
- Degree of Blocked Vision: Analyze the intersection to determine how much of the field of vision is obstructed by the mask.

Why Visual Field Testing Matters

Effective visual field testing ensures that respirators and masks provide:

- Safety: Users can remain aware of their environment, reducing accidents.
- Comfort: Minimizing visual obstructions enhances long-term wearability.
- Compliance: Adherence to industry standards and regulations is essential for product approval and user trust.


mask visual field testing machine


Common Industries Utilizing the mask visual field testing machine


1. Healthcare: Surgical and protective masks require unobstructed vision for precision tasks.
2. Manufacturing: Workers need clear peripheral vision to avoid accidents.
3. Emergency Response: First responders rely on masks that provide both protection and situational awareness.


What is Moving Die Rheometer GT-KR01 Complete Guide

What is Moving Die Rheometer GT-KR01: Complete Guide


The Moving Die Rheometer (MDR) GT-KR01 is a specialized instrument used to analyze the curing process of rubber compounds. GESTER will explain its purpose, application, features, working principles, and the standards.

Moving Die Rheometer


Application of the Moving Die Rheometer
The Moving Die Rheometer GT-KR01 plays a vital role in determining the rheological properties of rubber compounds during the curing phase. In practical terms, the Rubber Rheometer measures how a rubber compound behaves under specific conditions of heat and pressure, allowing researchers and manufacturers to optimize their formulations for desired performance characteristics.

The working setup of the rheometer involves placing a rubber specimen in a sealed pressurized cavity. Controlled heating is applied while the lower die produces sinusoidal oscillations. The corresponding torque response from the rubber compound is detected using a torque sensor attached to the upper die.

Key Features of Moving Die Rheometer GT-KR01
This device stands out for its advanced design and functionality. Below are the main features that define its superiority in rubber testing:

  • Advanced Rheometer Software: Equipped with cutting-edge software, the Moving Die Rheometer GT-KR01 enables in-depth analysis of the curing characteristics of rubber compounds.
  • Precision Measurements: The device can accurately determine essential curing parameters, including:
  • Scorch time (tₛ): The time required before the curing process starts.
  • Cure time (t₉₀): The time required for the rubber to reach optimal curing.
  • Cure rate: The speed at which the rubber compound cures.
  • Viscoelasticity: Measures the rubber's ability to resist deformation while retaining elasticity.
  • Cure plateau: Indicates stabilization during the curing process.
  • Research and Development Tool: Widely used in laboratories for R&D purposes, this rheometer supports innovation in rubber formulations.
  • Quality Assurance Utility: It plays a critical role in ensuring consistent and high-quality output in rubber manufacturing processes.

Standards Compliance
The Moving Die Rheometer GT-KR01 adheres to globally recognized standards, making it reliable and suitable for a variety of industrial applications:

  • GB/T 16584-1996: A Chinese national standard for rheological measurements.
  • ISO 6502-3-2018: International guidelines outlining procedures for evaluating vulcanization characteristics.
  • ASTM D5289-2017: An established American standard for determining dynamic properties of vulcanized rubbers.
By meeting these standards, the Moving Die Rheometer GT-KR01 assures compatibility and accuracy in diverse testing environments.

How the Moving Die Rheometer GT-KR01 Works
1. Sample Placement: A small sample of the rubber compound is positioned in a pressurized cavity between two dies.
2. Controlled Heating: The system applies heat at pre-specified temperatures to initiate curing.
3. Oscillation Mechanism: The lower die generates sinusoidal oscillations.
4. Torque Detection: The upper die detects the torque generated by the specimen as it undergoes the curing process. This data is then analyzed using rheometer software.
The resulting data provides a comprehensive profile of the rubber's curing characteristics, enabling better control over production processes.

Advantages of the Moving Die Rheometer
Using the Rubber Rheometer GT-KR01 comes with several benefits:

Optimized Formulations: Detailed analysis helps manufacturers fine-tune rubber compounds for specific applications.
Enhanced Efficiency: By identifying the curing times and rates, production schedules can be optimized, minimizing wastage.
Improved Product Quality: The Rubber Rheometer ensures that the end product consistently meets predefined performance standards.
Compliance with Regulations: Adherence to international standards ensures that the product is ready for global markets.

Common Applications
The Rubber Rheometer GT-KR01 finds its application across various industries where rubber is a critical material, such as:

Automotive: Testing tire compositions to ensure durability and performance.
Consumer Goods: Quality control for rubber items such as seals, gaskets, and footwear.
Industrial Manufacturing: Developing rubber components for machinery and tools.
Medical: Testing rubber formulations used in medical equipment and supplies.

Whether you’re in the automotive, industrial, or consumer goods sector, this mdr rheometer  delivers accuracy, reliability, and innovation, setting new benchmarks in rubber testing.

Composition of Electrical Components of High and Low Temperature Test Chamber

Composition of Electrical Components of High and Low Temperature Test Chamber

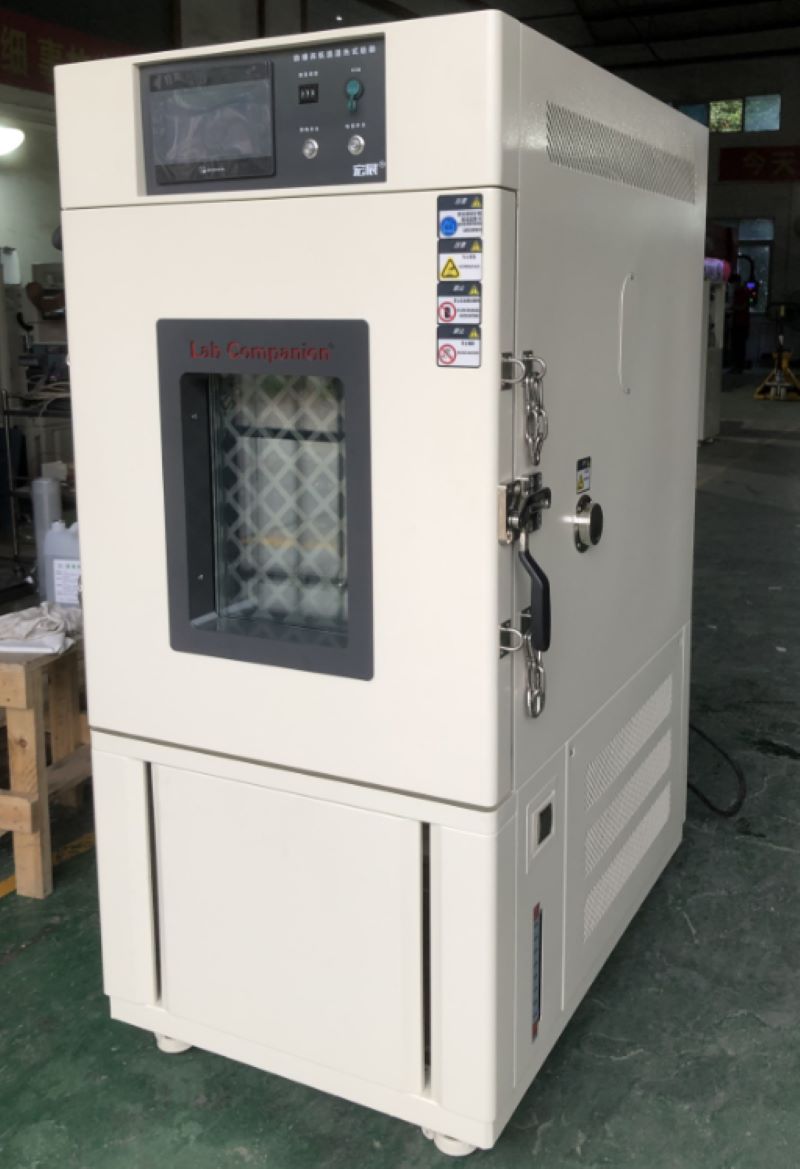
The main parts of the high and low temperature test chamber are refrigeration units, condensers, evaporators, and controllers. The main parts play a key role, so everyone pays special attention to its main parts raw materials. However, most of them ignore its auxiliary parts at this time, or feel that the role of auxiliary parts is not worth noting. Few people want to count the specific parts, so it is not clear what specific electronic components are fully used in the constant temperature and humidity test chamber.

1, Refrigeration unit:

Used to control the operation of refrigeration unit, to carry out refrigeration cycle, and there are single-phase and three-phase.

2, Fan motor:

Used to control the fan circulation steam body, heat exchanger heat conduction, and there are indoor and outdoor. 

3, Electric heater equipment:

Used for heating indoor air quality quality, tubular, flocculent points.

4, Timer:

Used for automatic control system timing boot.

5, DC contactor:

Used for refrigeration unit motor breaking and connection.

6, Leakage protector power switch:

It can not only connect or disconnect the main circuit like other switches, with the effect of leakage current detection and discrimination, when the main control circuit caused by power outage or cable sheath damage, leakage protection switch power supply main switch can be connected or disconnected switch components according to the identification results. It can be combined with isolation switch and heat relay to form a full-function low-voltage switching electronic device.

7, Overtemperature protection equipment:

Its role can not be ignored, when the controller temperature is not sensitive, the implementation of the E double maintenance of the box overtemperature, when the alarm is caused, the maintenance standby, the alarm will be different with the test temperature, relative change, you can further have the role of overtemperature maintenance. The basic concept is that when the total current flow of the broken wire exceeds the limit value, the temperature of the broken wire rises and the broken wire is broken. When the heat value caused by the broken wire does not exceed its short circuit capacity, the balance between the heat value and the released heat value is guaranteed, the temperature of the broken wire cannot reach the melting temperature, it is not easy to break.

Like this kind of small electronic components, in the high and low temperature test chamber looks innocuous, but for the structure of a test chamber is also very useful, without these components, a test chamber is not used, in short, the details determine the success of failure, fine without size, in the grasp of the test chamber at the same time, more should be from its key links to grasp.

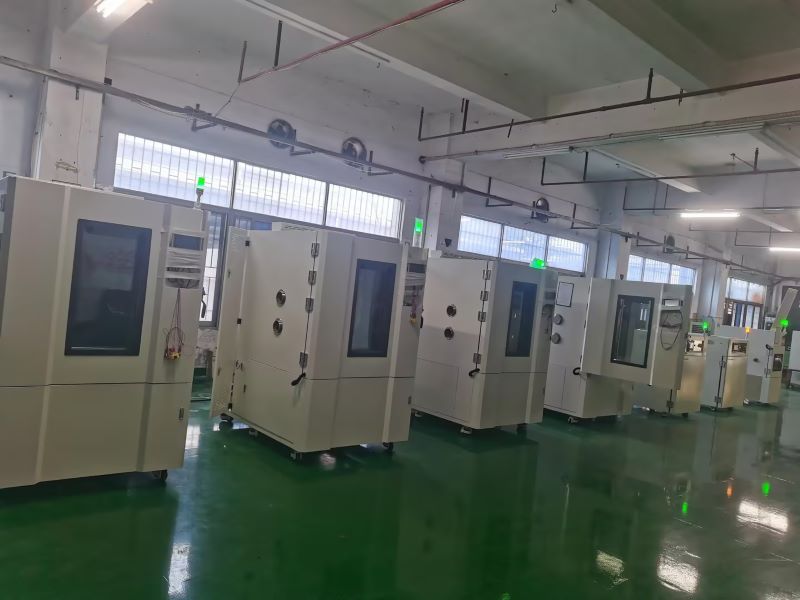
High And Low Temperature Test Chamber

Cooling Mode of Condenser in High and Low Temperature Test Chamber

Cooling Mode of Condenser in High and Low Temperature Test Chamber

High and low temperature test chamber is a common temperature test equipment in environmental test equipment, which is suitable for high temperature and low temperature reliability test of industrial products. The working principle of refrigeration in the high and low temperature test chamber is that the refrigerant flows out of the condenser under high pressure, passes through the throttling mechanism (capillary, thermal expansion valve, etc.), reduces its pressure, and then enters the evaporator. When the refrigeration medium enters the evaporator, it is a two-phase mixture (liquid and gas), which evaporates and absorbs heat under low temperature conditions in the evaporator. It then enters the condenser, where heat is released and condensed into a liquid. Xenon lamp aging test chamber uses xenon lamp with long arc as light source, which can provide corresponding environmental simulation and accelerated test for scientific research, product development and quality control. The vehicle environment simulation laboratory can simulate the test environment of engine cold start, vehicle high and low temperature, wind, frost, rain, snow, vehicle emission test, etc.

According to different refrigeration media, the cooling mode of the high and low temperature test chamber condenser can be divided into three types: air cooling, water cooling and liquid nitrogen refrigeration. Their medium is refrigerant, water and liquid nitrogen. Different media correspond to different evaporation temperatures, the same medium under different evaporation pressure, evaporation temperature is not the same.

The different cooling methods of the condenser in the high and low temperature test chamber make the components of the refrigeration different. The air cooling method consists of compressor, various refrigeration accessories, condenser, oil separator and so on. The water cooling method consists of: chiller, cooling tower, freezing pump and auxiliary equipment. Liquid nitrogen is composed of: liquid nitrogen tank, pressure transmitter, pressure gauge, flow meter, level meter, ultra-low temperature solenoid valve and so on.

No matter what kind of cooling method is used in the high and low temperature test chamber condenser, high reliability and safety are the most basic requirements. Instrument test equipment of Lab Companion can provide a variety of condenser cooling methods according to customer needs.

In addition to the high and low temperature test chamber, instrument of Lab Companion also produces all kinds of temperature and humidity test chamber, constant temperature and humidity test equipment, aging chamber (ultraviolet, xenon lamp, ozone aging chamber), thermal shock test chamber, high temperature aging machine and other equipment, all the equipment is produced according to national standards and industry specifications.

 High And Low Temperature Test Chamber

Display and Heating System of Temperature and Humidity Test Chamber

Display and Heating System of Temperature and Humidity Test Chamber

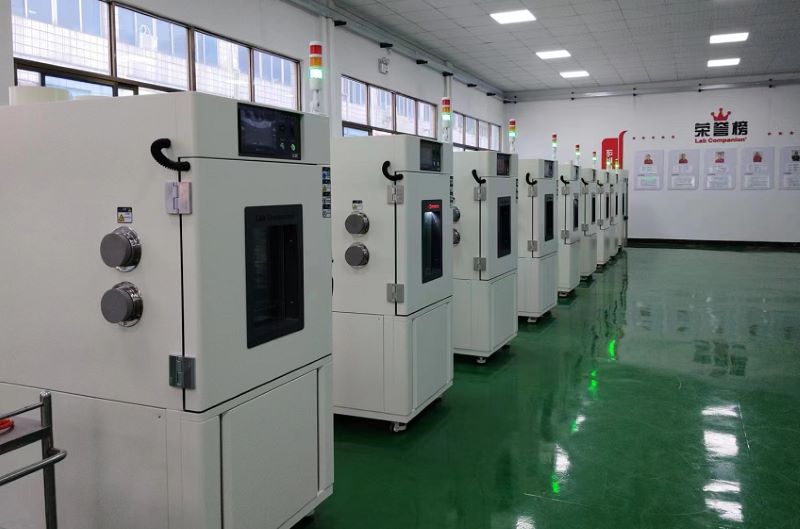
The display and control interface of temperature and humidity test chamber is intuitive and clear, and the light touch selection menu is simple and easy to use, and the performance is stable and reliable. Flexible program control, to bring users stable performance, flexible control, cost-effective products. The input channel and output channel can be expanded arbitrarily. It is a test equipment for aviation, automotive, home appliances, scientific research and other fields, used to test and determine the parameters and performance of electrical, electronic and other products and materials after temperature environment changes in high temperature, low temperature, alternating temperature and humidity degree or constant test.

Product features:

1, Use CNC cutting, laser opening, mass production test chamber.

2, Spray strictly use outdoor powder, powder is not recycled once use, strong adhesion without variegation.

3, The visual window frame is made of one-time opening mold, which has a strong industrial sense.

4, The instrument panel made of one-time mold is beautiful and generous. The label on the instrument panel uses PVC stickers and the back glue uses 3M glue.

5, The caster adopts the free adjustment height caster made by Qidong Baiyun Electronics original factory, non-market counterfeit products, high quality, beautiful and generous.

6, All the standard drawings of the refrigeration system are welded to ensure that the piping of each equipment is consistent, and the refrigeration performance has reached the appropriate state.

7, Wiring of all the standard drawings of the electrical system, thirteen inspection processes after the completion of wiring to ensure accurate wiring and no trouble.

8, The water system uses three cups to control the water level to ensure that the humidifier water supply is separated from the wet bulb water level. The temperature fluctuation caused by humidifier water is avoided.

Display:

1, The original brand temperature and humidity meter, 5.7-inch high-definition true color LCD touch screen.

2, Real-time monitoring (monitoring controller real-time data, signal point status, actual output status).

3, The controller can store the historical data within 600 days (when the temperature and humidity data are recorded at the same time at a recording interval of more than 1 minute in 24-hour operation), and can play back the uploaded historical data curve.

4, The exported files can be viewed on the computer or converted into EXCEL format by random gift software.

5, Instrument equipped with RS232/485 port.

6, With automatic calculation function, the temperature and humidity change conditions can be corrected immediately, so that the temperature and humidity control is more safe and stable.

Heating system:

1, The use of far infrared nickel alloy high-speed heating (2KW×2) electric heater;

2, High temperature independent system, does not affect low temperature test, high temperature test and alternating temperature and humidity;

3, Temperature and humidity control output power is calculated by microcomputer to achieve high precision and high efficiency.

Temperature And Humidity Test Chamber

Efficacy of Electronic Expansion Valve in High and Low Temperature Test Chamber

Efficacy of Electronic Expansion Valve in High and Low Temperature Test Chamber

The electronic expansion valve of the high and low temperature test chamber adjusts the water supply rate of the air conditioning evaporator according to the preset program flow, which is called the electronic expansion valve because it belongs to the electronic adjustment mode. It integrates the development trend of refrigeration mechatronics, with the unparalleled characteristics of the expansion valve, and presents the standard for the intelligent system operation of the refrigeration system of the quotation of the high and low temperature test chamber. It is a kind of automatic control environmental protection and energy-saving components with great development prospects, and is the orientation of the development trend of the quotation of the high and low temperature test chamber in the future.

The main purpose of the electronic expansion valve and the hot air conditioning expansion valve is basically the same, and the structure is various, but in the characteristics, the two have great differences. From the perspective of control and maintenance, the electronic expansion valve is composed of three parts: control board, electric actuator and controller. Generally speaking, most of the electronic expansion valve only refers to the electric actuator, that is, the controllable drive equipment and the oil circuit board. In fact, only this part is unable to operate.

The key hardware configuration of the electronic expansion valve control board is designed by single chip microcomputer, such as the control board also needs to operate the DC frequency conversion of the refrigeration compressor and the centrifugal fan, and the method of multi-machine cascade is generally selected. The controller of the electronic expansion valve generally uses thermal resistance or thermal resistance. As a new type of hydraulic control system, electronic expansion valve has been early to improve the definition of throttle organization, which is the key step of the intelligent system of refrigeration system, is the key way and ensure that the refrigeration system is upgraded enough to truly maintain, is a representative of the mechanical and electrical engineering of refrigeration system, has been used in more and more industries. Because of the selection of electronic expansion valves, the awareness of a certain type of system submission to expansion valves existing in the whole process of the refrigeration unit design scheme has been enhanced, and the new pattern of air conditioning expansion valves for system improvement services has played a key role in the development trend of the refrigeration manufacturing industry.

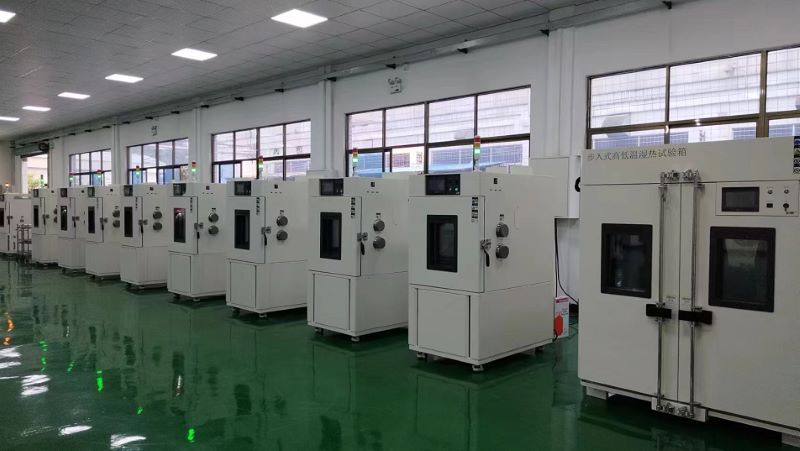
The high and low temperature test chamber can complete the test process according to the pre-set curve, and can accurately control the temperature rate within the range of the heating rate capacity, and can control the heating and cooling rate according to the slope of the set curve.

Temperature control is a heating process, high and low temperature test chamber heating using independent heating, far infrared nickel-chromium alloy high-speed heating wire, P.I.D+S.R system co-channel coordinated temperature control, through microcomputer calculation of output power, to obtain high-precision, high-efficiency electricity benefits. In order to achieve rapid heating and high temperature, the method of increasing the number of heating wires and improving the temperature control performance of software is generally adopted. By using international brand compressors and circulating fans, the chamber has uniform temperature distribution, high efficiency for environment-friendly refrigerant, low energy consumption and saved energy. The use of energy regulation technology in the design of refrigeration system can not only ensure the normal operation of the unit, but also effectively adjust the energy consumption and cooling capacity, so that the refrigeration system is in a good running state.

High And Low Temperature Test Chamber