Recently, customers provided feedback on two issues regarding the installation of quick fittings. They wanted to know how to install quick fittings correctly and how to determine if the fitting has been successfully installed. They requested assistance from HBS Firstly, let's address the proper installation of quick fittings. Customers reported that they were unable to install the fittings successfully even when pressing them directly to the bottom. Here's a handy tip: when pressing the fitting to the bottom, apply rotational force and listen for a clicking sound. This indicates a successful installation. Secondly, how to determine if the quick fitting has been installed correctly. Let's compare images of correct and incorrect installations. If the spring inside the fitting pops out, it means the installation was successful. In summary, when using quick fittings in condensers, it is important to press the fitting to the bottom while applying rotational force. When you hear a clicking sound and see the spring inside the fitting pop out, the installation is considered successful.

How to replace an evaporator
Bad cooling performance and refrigerant leaks are common issues that can hinder the efficient operation of automotive air conditioning systems. In this video, we use Nissan sylphy evaporator as an example to demonstrate how to replace the AC evaporator, ensuring a cooler and more comfortable temperature inside your vehicle. Learn the step-by-step process to enhance the performance of your air conditioning system and beat the heat.
First, disassemble the components below the dashboard and remove the evaporator assembly before starting to dismantle the old evaporator. The entire process requires careful handling to avoid damaging other parts, as there are many delicate components and circuits surrounding the evaporator. Each screw and connector must be removed one by one to prevent damage to other components. Once the assembly is disassembled, we can observe that the evaporator has aged due to long-term use, resulting in dirt accumulation and refrigerant leaks, which can cause unpleasant odors and inadequate cooling in the air conditioning system.
Next, we proceed with the replacement of the new evaporator. Firstly, it is important to ensure that the connections and dimensions of the new and old evaporators are compatible。Then we need to check the performing of airtightness. The water leak test is a commonly used method in automotive air conditioning repair to detect potential evaporator leaks. Installing the new evaporator requires proper alignment, secure fixing, and connecting the pipelines to ensure a correct installation. When installing screws, caution should be exercised to avoid overtightening or loosening. Finally, it is necessary to check all connections and fixings for proper placement before reassembling the evaporator back into its original position. After replacing the evaporator, the outlet temperature measures 6.6 degrees Celsius (43.88 degrees Fahrenheit), compared to 13.2 degrees Celsius (55.76 degrees Fahrenheit) prior to replacement.
How to replace the car condenser
The steps to replace a condenser are as follows:
Preparation: First, ensure that the power is turned off and wear protective gloves and goggles to avoid the risk of electric shock. Prepare the necessary tools and materials, including wrenches, screwdrivers, pliers, sealant, a new condenser, and coolant.
Remove the old condenser: Turn off the power and cooling system, drain the coolant, and then remove the connecting pipes and mounting fixtures. When disassembling, pay attention to marking the connection positions of each pipeline for future installation.
Install the new condenser: Position the new condenser in place and secure it using screws or brackets. When connecting the pipes, ensure that the joints are tight and gap-free, and use sealant to further enhance the sealing. When injecting refrigerant, follow the system requirements and pay attention to the fill amount and speed to avoid excessive or insufficient filling.
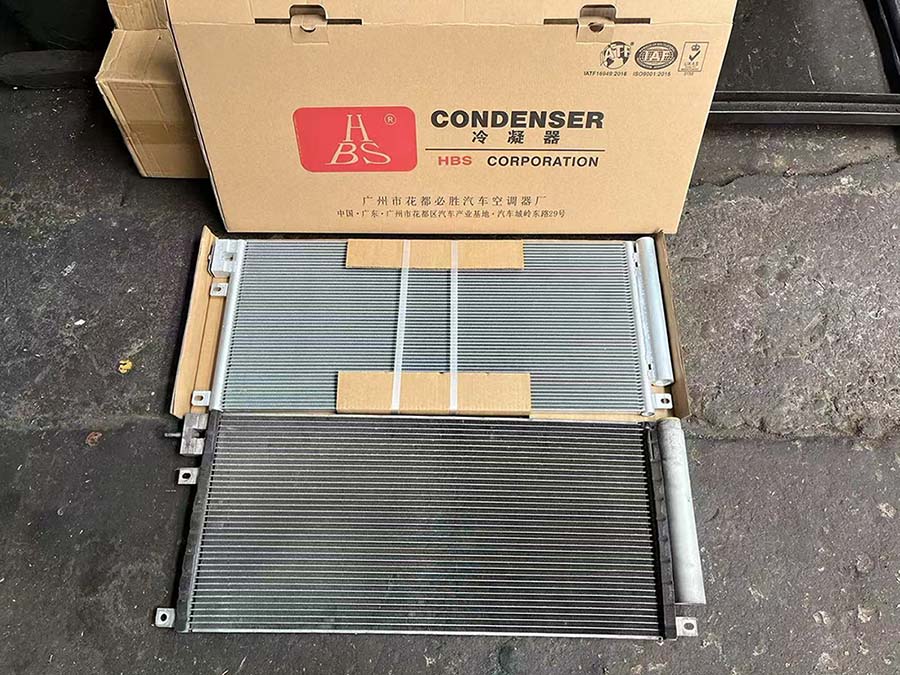
Test and adjust: Connect the power and start the equipment, observe the operation and cooling effect of the condenser. According to the equipment manual, make reasonable adjustments to the refrigeration system parameters to ensure the proper operation of the condenser.
Leakage check: Perform a thorough leak check before starting the equipment to ensure that all connections are leak-free.
Record and maintenance: Keep detailed records of the condenser replacement time and relevant data for future maintenance and inspection work. Regular inspections and maintenance should be conducted after replacement to ensure stable equipment operation.
Common causes of condenser failure include dirt accumulation, material corrosion, coolant leakage, and mechanical damage. These factors can reduce the heat dissipation efficiency of the condenser and affect the overall performance of the refrigeration system. Therefore, regular maintenance and timely replacement of faulty condensers are crucial for ensuring efficient equipment operation.
How to Replace the Condenser in a 2006 Volkswagen Sagitar
The condenser is a crucial component of the car's air conditioning system.However, when the condenser becomes damaged, the cooling efficiency of the air conditioner may decrease, or it may fail to function properly. In such cases, replacing the condenser becomes necessary. Let's now take a closer look at how to replace the condenser in a 2006 Volkswagen Sagitar, so you can get a better understanding of the process.
Step 1: Preparing for the Replacement
Before starting the replacement process, it is essential to ensure your personal safety. Make sure to switch off the power supply, wear protective gloves, and safety goggles to minimize any potential electrical hazards. Gather the necessary tools and materials, including a wrench, screwdriver, pliers, sealant adhesive, a new condenser, and refrigerant.
Step 2: Removing the Old Condenser
Begin the process by shutting off the power supply and refrigeration system. Drain the cooling liquid, then carefully dismantle the connection pipes and fasteners. It's important to mark the position of each pipe connection to facilitate the installation process.
Step 3: Installing the New Condenser
Place the new condenser in its designated position and secure it using screws or brackets. When connecting the pipes, ensure a tight and gap-free fit between each joint. Use sealant adhesive to reinforce the sealing. During refrigerant injection, follow the system requirements, paying close attention to the recommended fill quantity and speed, preventing overfilling or underfilling.
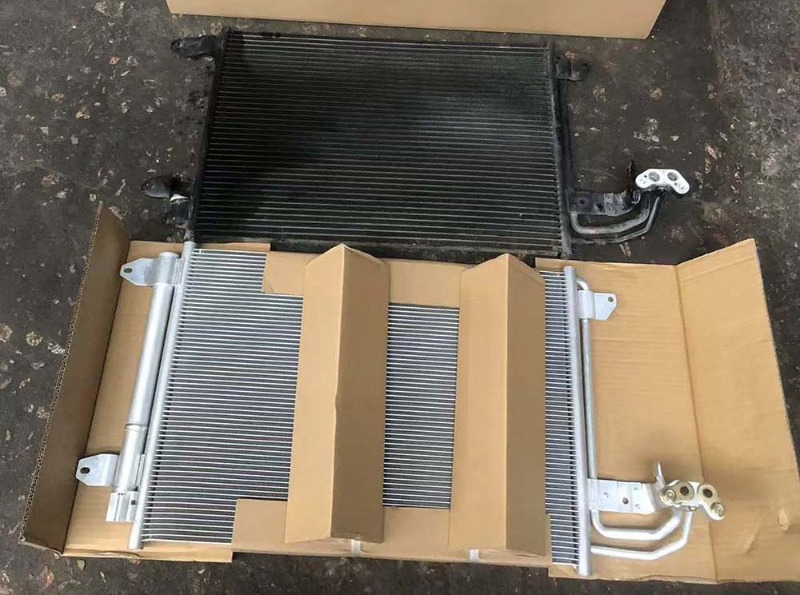
Step 4: Testing and Adjusting
Power on the system and start the vehicle. Observe the functioning of the newly installed condenser and evaluate its cooling performance. Refer to your device manual to make necessary adjustments to the refrigeration system parameters, ensuring optimum operation of the condenser.
Step 5: Leak Check
Before finalizing the installation, perform a thorough leak check. Ensure all connections are free from any signs of leakage or damage.
Step 6: Record and Maintenance
Maintain a detailed record of the condenser replacement, including the date and relevant data, to facilitate future maintenance and inspection. Additionally, it is crucial to schedule regular check-ups to ensure the stability and longevity of your vehicle's AC system.
Condenser failure in automotive AC systems can arise from various factors, including debris accumulation, material corrosion, refrigerant leaks, and mechanical damage. These issues can significantly impact the cooling efficiency of the condenser and the overall performance of your AC system. Therefore, regular maintenance and timely replacement of faulty condensers are critical to ensuring the efficient operation of your vehicle.
Where is the evaporator on a Honda
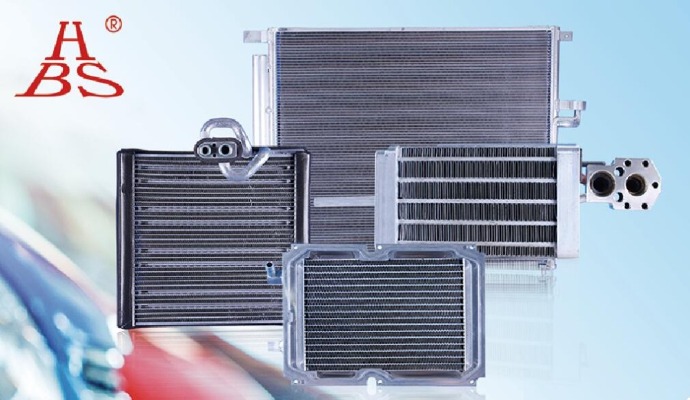
The evaporator plays a crucial role in the car's air conditioning system. It is responsible for absorbing heat during the process of refrigerant transitioning from a liquid to a gas state, enabling cooling to take place. The refrigerant enters the evaporator through an expansion valve, where it turns into a mist and then transforms into a gas under low pressure. During this transformation, it absorbs heat from the surrounding air, causing the air passing through the evaporator to become cool, which is then blown out through the AC vents.
The installation position of the evaporator is usually hidden and not easily observable, typically located in the middle or bottom section of the central control panel, although the exact location may vary depending on the vehicle model. In most cases, the evaporator is installed inside the passenger-side dashboard, typically situated behind the AC filter. For example, in Honda cars, the evaporator is commonly found within the dashboard on the passenger side, immediately following the AC filter.
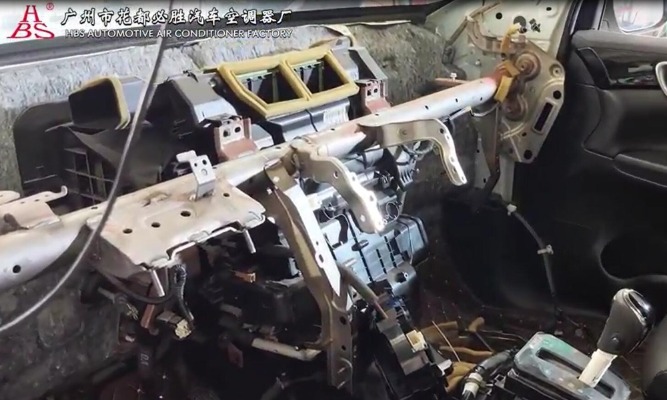
Additionally, the evaporator can sometimes be positioned beneath the dashboard, below or near the windshield. Its specific placement may differ based on the vehicle's design and configuration. Proper installation and maintenance of the evaporator are essential for ensuring optimal performance and longevity of the car's air conditioning system, as it directly affects the cooling efficiency and comfort of the vehicle's interior.
Why condenser will be damaged
Air conditioning condensers are crucial components of AC systems that require regular maintenance to ensure optimal performance and extend their lifespan. This article aims to explore the common causes of condenser damage and provide practical maintenance measures to mitigate these issues effectively.
Causes of Condenser Failure:
1.Corrosion:
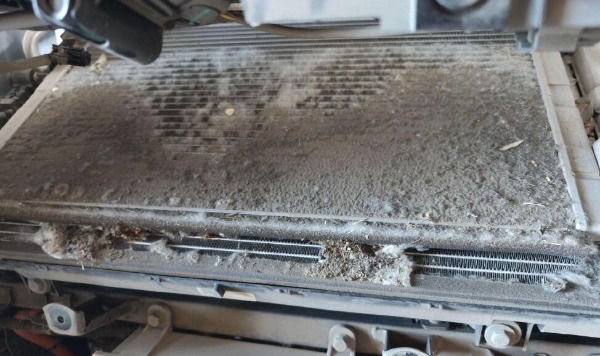
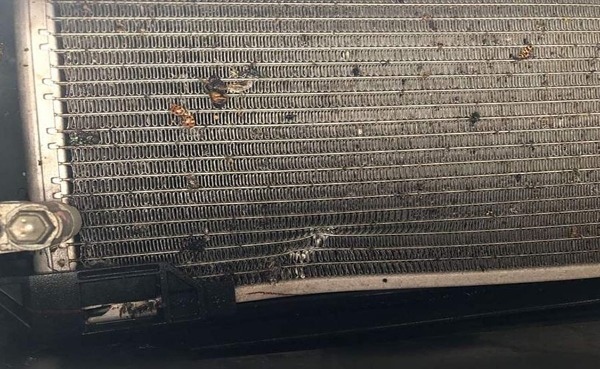
The condenser, typically located at the front of the vehicle, is vulnerable to impacts from stones, insects, and other debris. These external elements can lead to corrosion and damage the condenser's surface, hampering its functionality.
2.Tube Leaks:
The condenser comprises numerous tubes responsible for heat dissipation. Over time, these tubes may develop leaks due to vibrations, wear and tear, or corrosion, ultimately diminishing the condenser's performance.
3.Blockage:
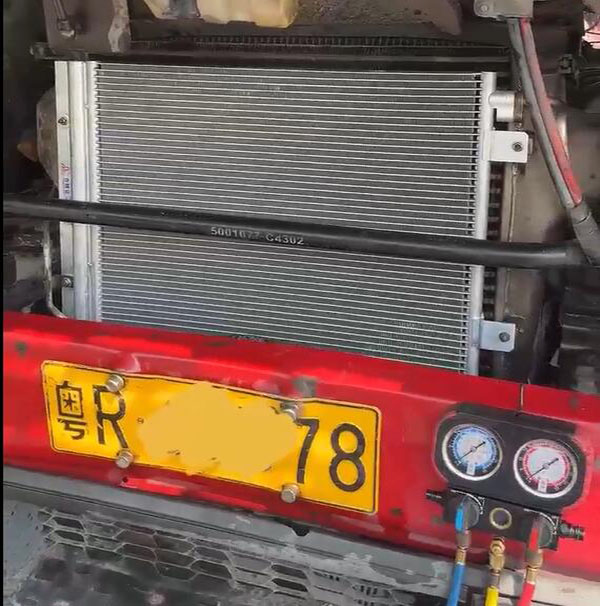
Accumulation of dust, impurities, and debris on the condenser surface can impede heat dissipation, resulting in reduced efficiency. This places additional strain on the compressor, potentially leading to system malfunctions.
Maintenance Measures to Prolong Condenser Lifespan:
1.Regular Cleaning:
Periodically cleaning the condenser is crucial for maintaining optimal performance. Utilize high-pressure water jets or specialized cleaning agents to thoroughly rinse the condenser surface, eliminating dust, impurities, and grime.
2.Inspection and Repairs:
Regularly inspect the condenser's surface for signs of damage or corrosion, and promptly address any identified issues. In case of leaks or severe damage, it is advisable to seek assistance from professional technicians for repair or replacement.
3.Avoid Impact and Damage:
Take precautions to minimize potential impacts or damage to the condenser. Be mindful of stones and other objects on the road, and avoid exposing the condenser to external elements when parking the vehicle.
4.Regular AC System Maintenance:
The proper functioning of other components within the AC system can significantly impact the condenser's performance. Perform routine maintenance on the AC system, including checking refrigerant levels, pressure, and the working condition of other critical components.
Maintaining the health of air conditioning condensers is essential to ensure their longevity and optimal performance. By following these recommended measures, such as regular cleaning, inspection, and timely repairs, as well as overall AC system maintenance, you can enhance the lifespan of your condensers and promote efficient cooling throughout your AC systems.
Why the screw will piercing the evaporator
Recently, HBS We use a Accord evaporator Therefore, when installing the connecting pipe, an additional step of comparing the lengths of the retaining plate and the screw can prevent it piercing the evaporator

What are the new generation of automated bending solutions?
The next generation of automated bending solutions include the following:
1. Automatic bending machine: Automatic bending machine adopts advanced numerical control technology and mechanical structure, which can automatically complete the bending operation through program control. It has the characteristics of high precision, high efficiency and stability, and can realize the bending of complex shapes.
2. Robot-assisted bending system: This solution combines the robot with the bending machine to realize the automatic loading and unloading and positioning of the workpiece by the robot, and improves the automation of the entire bending process. Robot-assisted bending systems can be adapted to different sizes and shapes of workpieces and are flexible and versatile.
3. Intelligent control system: The new generation of automatic bending solutions also includes intelligent control systems using artificial intelligence and machine learning technology. This kind of system can automatically identify workpiece characteristics and process parameters by learning and optimizing algorithms, realize intelligent bending process control, and improve production efficiency and product quality.
4. Automatic process planning software: The automatic bending solution can also be equipped with advanced process planning software, which can automatically generate the optimal bending path and process parameters through three-dimensional modeling and simulation analysis of the workpiece, providing fast and accurate processing solutions, reducing manual intervention and improving production efficiency.

The emergence of these new generation of automated bending solutions has made the bending process more intelligent, efficient and precise, meeting the modern manufacturing industry's requirements for fast, flexible and high-quality production.
If you have more ideas, please contact us!
Tel: +86 -18855551088
Email: Info@Accurl.com
Whatsapp/Mobile: +86 -18855551088
Introduction to the principles and operation methods of tensile testing machine
Measuring principle of tensile machine:
1.The force value of the tensile testing machine is measured through a load cell, amplifier and data processing system. Under the premise of small deformation, the strain e at a certain point of an elastic element is proportional to the force on the elastic element, and also proportional to the elastic deformation. Taking the S-type testing machine sensor as an example, when the sensor is subjected to the effect of tensile force P, since a strain gauge is attached to the surface of the elastic element, and the strain of the elastic element is proportional to the magnitude of the external force P, the strain gauge is connected to the measurement circuit. , you can measure its output voltage and then measure the force.
2. The deformation of the tensile machine is measured through the deformation measuring device, which is used to measure the deformation of the sample during the experiment. The device has two chucks, which are connected to the photoelectric encoder installed on the top of the measuring device through a series of mechanical mechanisms. When the distance between the two chucks changes, the shaft of the photoelectric encoder is driven to rotate, and the photoelectric encoder There will be a pulse signal output. This signal is then processed by the processor, and the deformation of the sample can be obtained.
3. The principle of measuring the displacement of the tensile machine beam is roughly the same as that of the deformation measurement. The displacement of the beam is obtained by measuring the output pulse number of the photoelectric encoder.
How to operate:
(1) Regarding the loading and unloading of specimens: The round specimen is clamped in the center of the round jaw clamp, and the specimen is clamped. The flat specimen must be perpendicular to the fixture and cannot be skewed. The clamping part must be long enough, at least 3/4 of the length of the clamping block. When the upper and lower chucks are clamped, it is prohibited to raise or lower the beam.
(2) Regarding force value clearing: used to display sampled data, there is a sensor bar on the main interface of the software. The electronic tensile testing machine can display the values of 4 types of sensors, namely test force, displacement, extensometer, and peak force. Usually after clamping the test piece and installing the extensometer, each sensor must be cleared before the test can be started. However, the reset of the force sensor is more special. First, clamp the upper chuck of the stretching fixture, then adjust the lower beam to the appropriate position, clear the force value, and then clamp the lower chuck.
(3) Permanent deformation: After the load is removed, the material still remains deformed.
(4) Yield point: When the material is stretched on an electronic tensile testing machine, the deformation increases but the stress remains unchanged. This point is the yield point. The yield point is divided into upper and lower yield points, and the upper yield point is usually used as the yield point. Yield: The load exceeds the proportional limit and is no longer proportional to the extension. The load will drop suddenly, and then fluctuate up and down over a period of time, and the extension will change greatly. This phenomenon is called yielding.
(5) Yield strength: When stretching, the load at which the permanent elongation reaches a certain specified value is divided by the original cross-sectional area of the parallel part.
(6) Spring K value: the ratio of the weight of the force in the same phase as the deformation and the deformation.
(7) Effect elasticity and hysteresis loss.

Email: hello@utstesters.com
Direct: + 86 152 6060 5085
Tel: +86-596-7686689
Web: www.utstesters.com
Precautions for using ICI pilling and pilling instrument
The ICI pilling tester is suitable for detecting the pilling phenomenon caused by friction on the fabric surface without pressure, and is suitable for woven and knitted fabrics.
Meet the standards:
ASTM D3939, GB/T 11047, JIS L1058
Scope of application:
The ICI hammer-type snagging tester can quickly detect the ease of fabric snagging (that is, the yarn is hooked out of the fabric) under normal wearing conditions.
Product introduction:
This instrument is equipped with an observation box and comparison pattern cards of different fabric structures. Equipped with 4 test rollers (covered with the fabric to be tested), the hammer ball is a tungsten carbide head and is controlled by a predetermined electronic counter.
Instrument description:
This tester is suitable for testing knitted and woven outerwear fabrics and other fabrics that are prone to snagging. It is especially suitable for testing the snagging performance of chemical fiber filaments and their deformed yarn fabrics.
Precautions for using ICI Pilling Tester:
1. The voltage should be maintained stable during use to avoid burning out the power supply.
2. Clean the cork liner regularly with a suitable cleaning solvent, such as industrial methylated spirit or trichloroethane.
3. When replacing the experimental tube, the new experimental tube must be inspected before use.
4. Regularly check whether the control panel buttons and screws in various parts are normal.
5. Clean the instrument before and after each experiment to ensure that all lint and debris are removed from the box.
6. The reference fabric should be retested every six months and compared with the original test specimen.

Email: hello@utstesters.com
Direct: + 86 152 6060 5085
Tel: +86-596-7686689
Web: www.utstesters.com